
How To Build a Table Saw Crosscut Sled

Updated: May 31, 2023
Make crosscuts on the table saw more accurately, repeatably and safely with a crosscut sled.
A half day
Beginner
$100 - $200
Introduction
A crosscut sled adds functionality to any table saw and makes delicate cuts safer. This simple design is easy to build and will serve you for years to come.Tools Required
- Dado blade
- Drill driver
- Table saw
- Try square
Materials Required
- 3/4-in. Baltic Birch Plywood
- 3/4-in. MDF
- 36-in. T-track
- 18-in. T-track
- Thick CA Glue

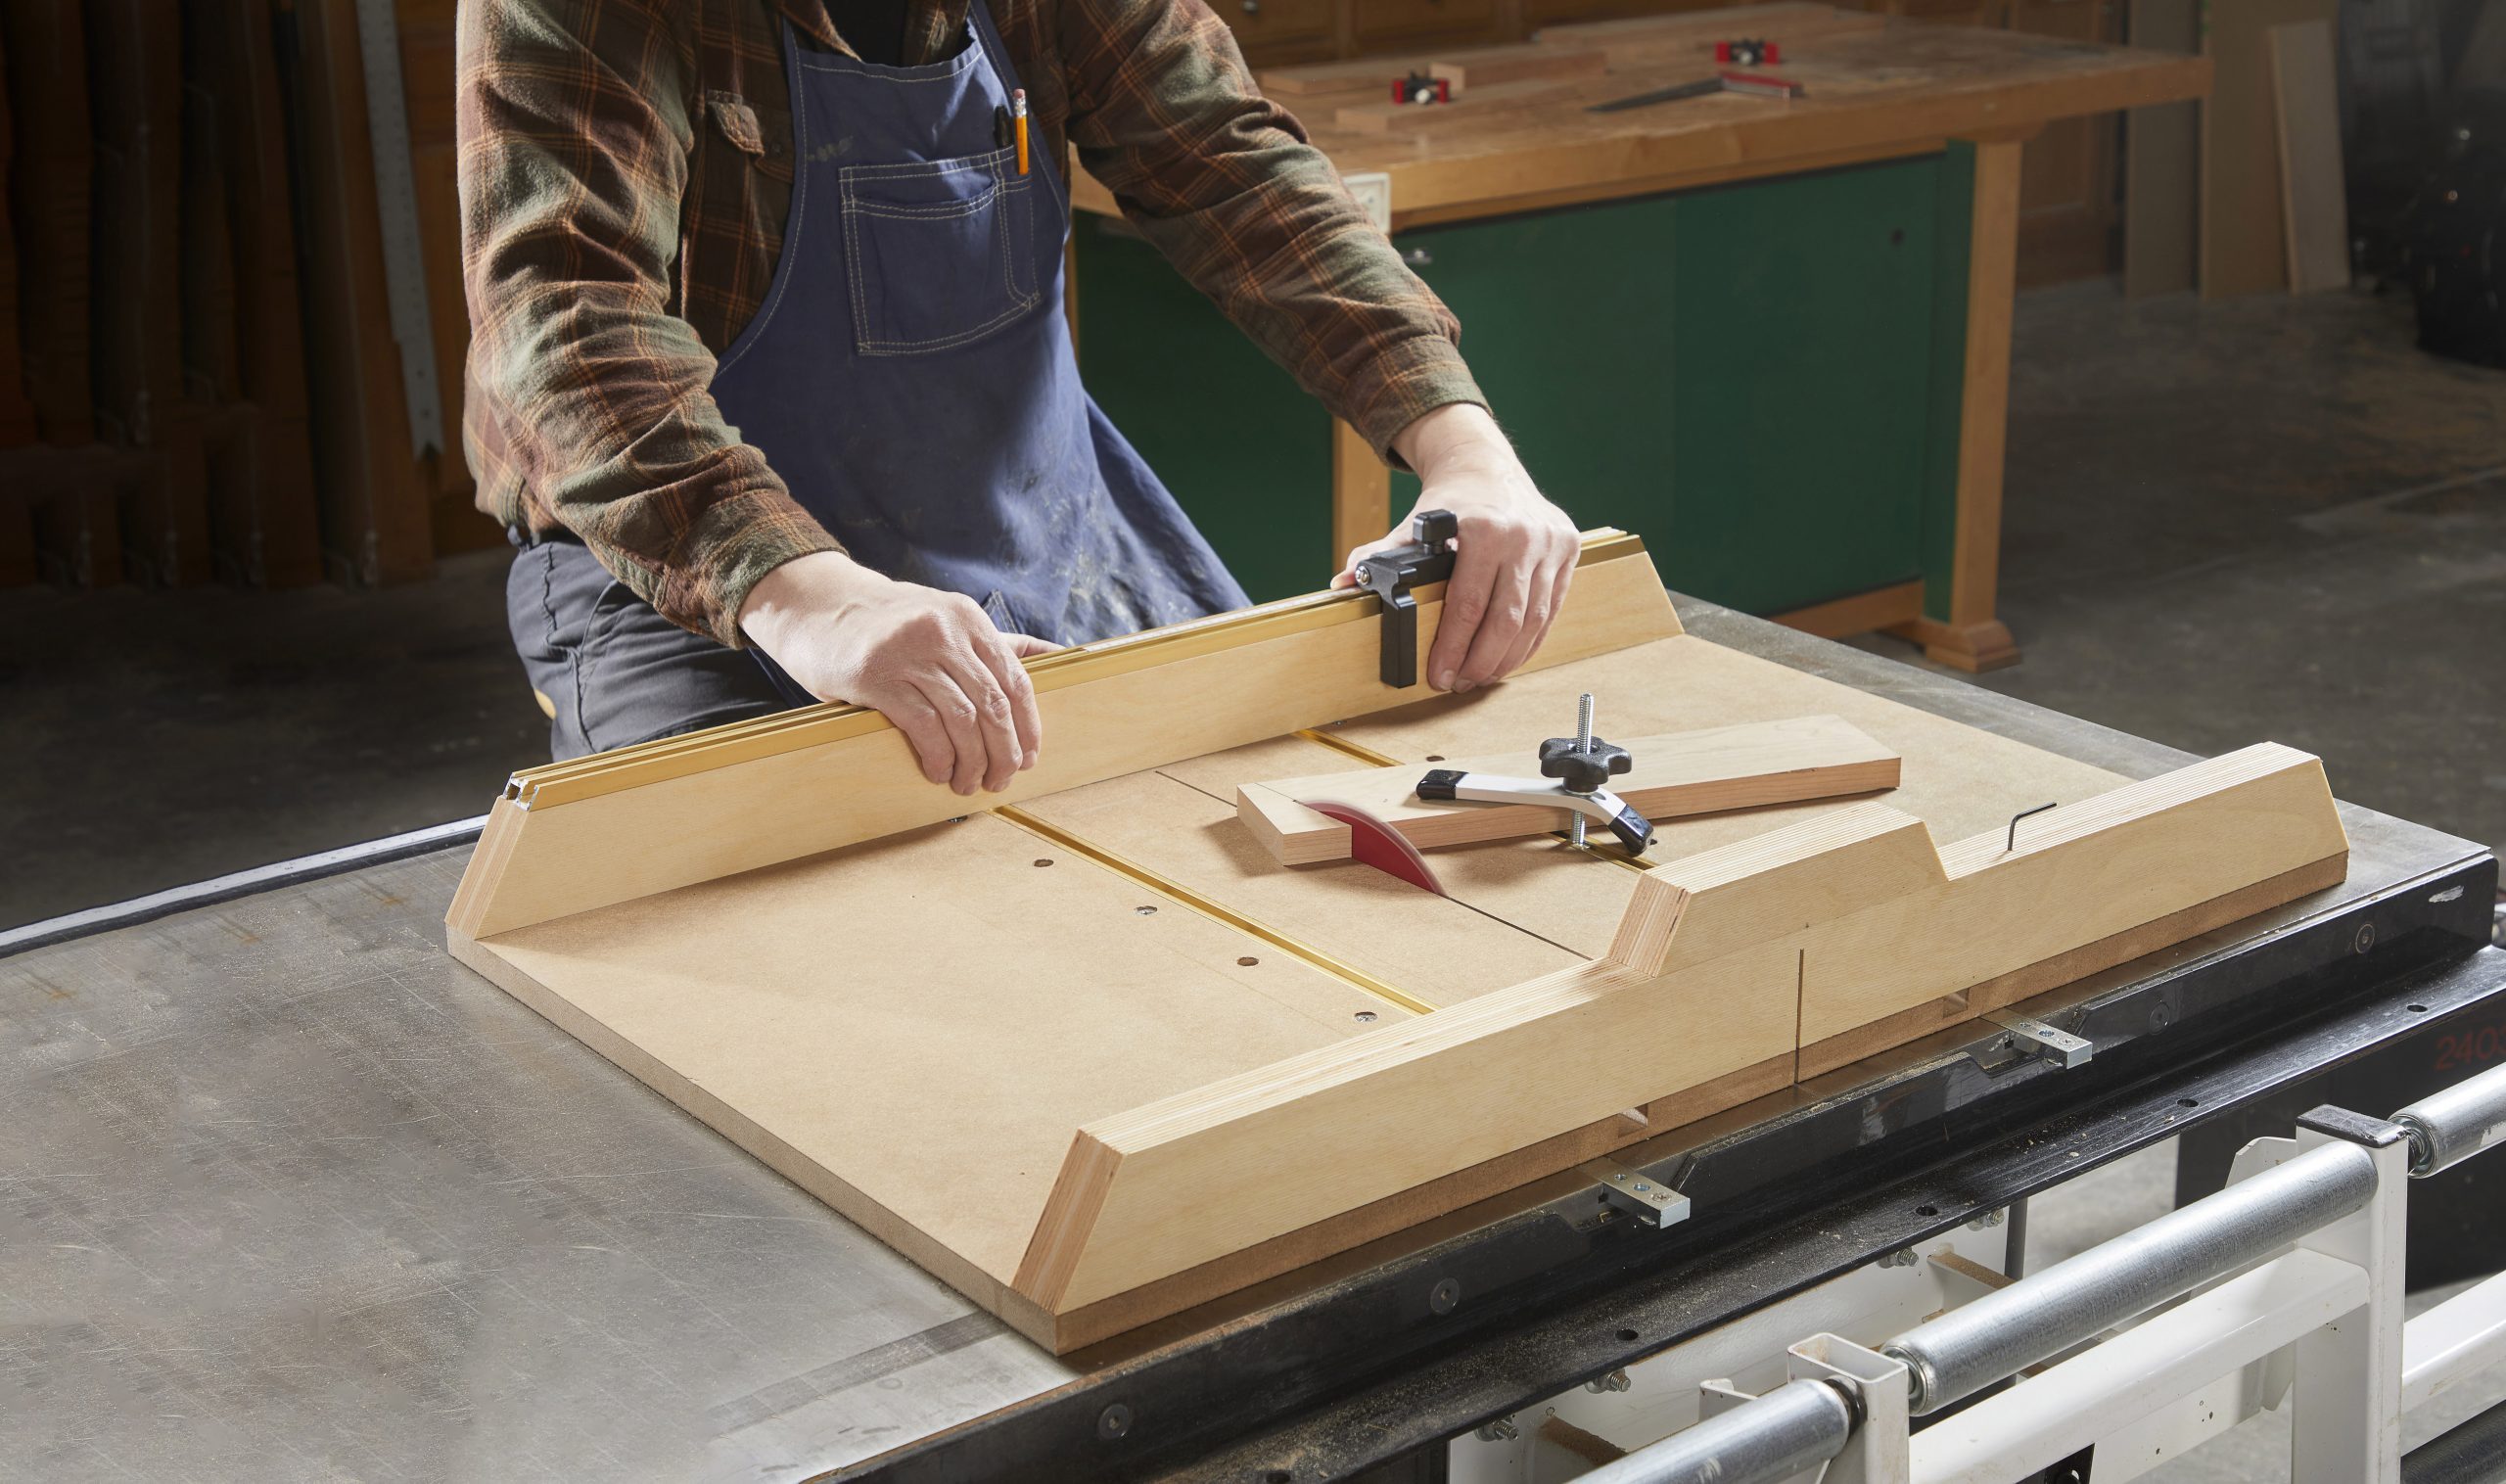
Figure A: Crosscut Sled
Overall dimensions: 36-in. W x 24-in. D x 5-1/4-in. H.

Cutting List
| KEY | QTY. | DIMENSIONS | PART |
| A | 1 | 36″ x 24″ | Sled base |
| B | 2 | 36″ x 3″ x 1-1/2″ | Fence |
| C | 2 | 36″ x 3″ x 1-1/2″ | Bridge |
| D | 2 | 8″ x 1-1/2″ x 1-1/2″ | Bridge cap |
Project step-by-step (6)
Install T-Tracks
Cut 3/4-in. dadoes in the medium density fiberboard (MDF) base 13 inches from both edges. Secure the T-tracks in the channels with 5/16-in. screws.

Attach Miter Sliders to the Sled
Miter sliders are come in a range of styles, even homemade strips of solid wood cut to fit the miter slot. I used solid steel miter sliders made by Incra ($28 each). They won’t bend, and a tab on their leading edge keeps the sled from tipping out of the miter slots.

Glue the Bridge to the Sled Base
Use thick CA glue with accelerator to attach the bridge to the sled base. It doesn’t have to be perfectly straight or square; it’s there simply to keep the two halves of the sled together.

Make the Kerf
With the blade completely elevated, run the sled through the saw until the blade is two inches away from the back edge.

Align the Fence to the Blade
With the sled still on the saw, place the try square against the blade to align the fence to the saw, then glue the fence to the base. I used slow CA glue to give me time to make minor adjustments. When the glue is dry, secure the bridge and fence with countersunk 1-1/4-in. screws driven from the bottom.

Attach the T-Track to the Fence
Cut the T-track to length and align it to the face of the fence. Attach the track with one-inch No. 6 wood screws.

Originally Published: February 22, 2022