
How to Reface Your Kitchen Cabinets

Updated: Aug. 30, 2022
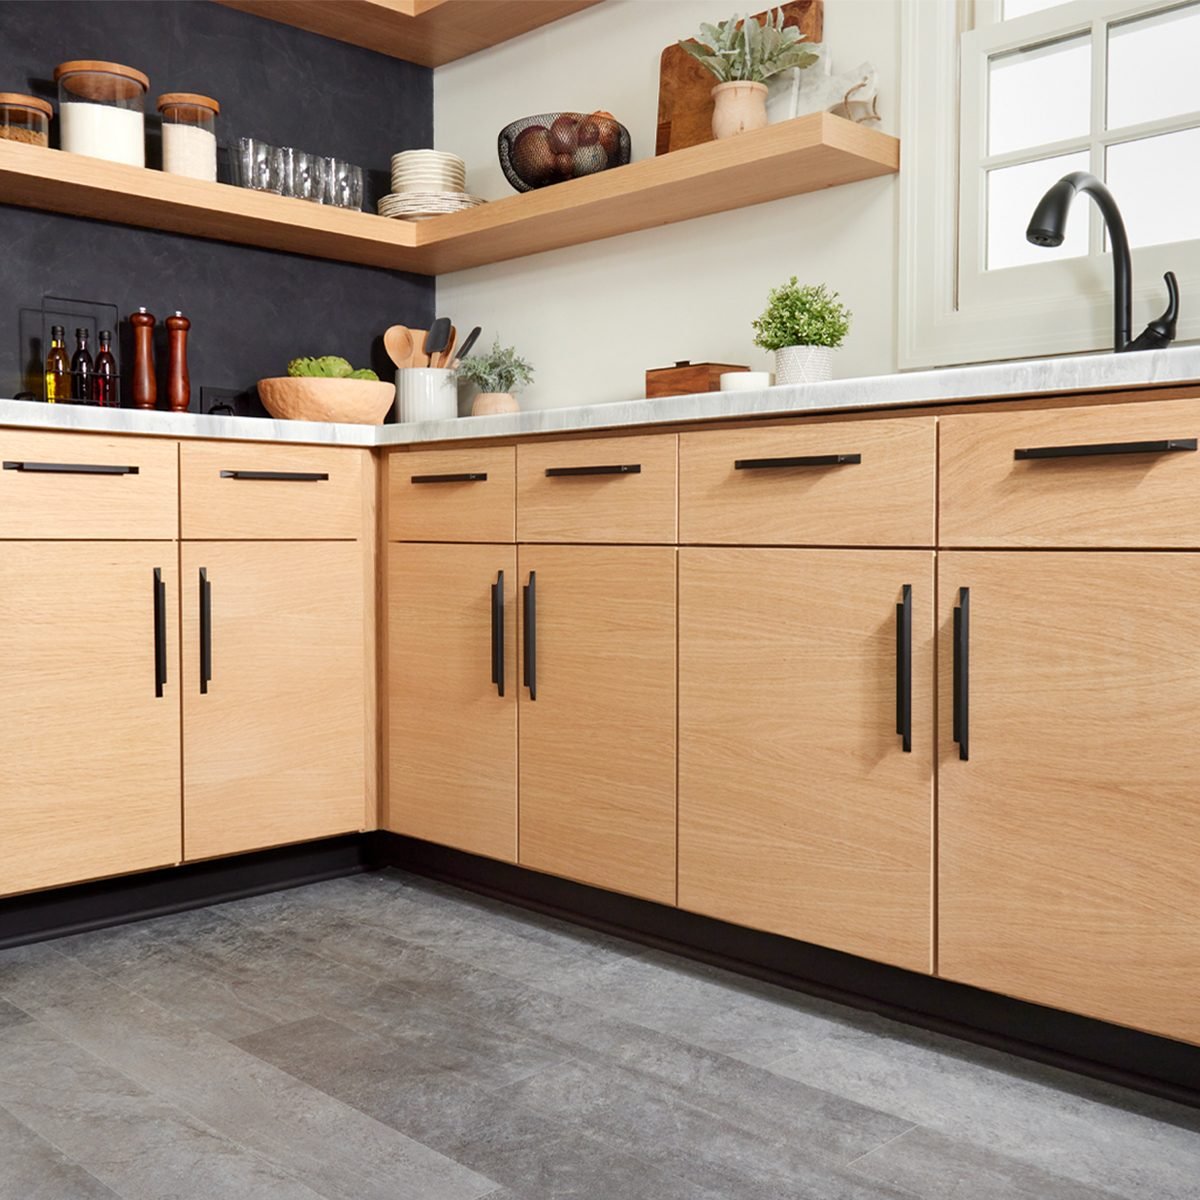
Add beauty and value to your kitchen.
Four Days
Intermediate
$2000 - $3000
Introduction
We’ve all seen ugly kitchens — cabinets stained from decades of use, or a cringeworthy outdated style. Hiring a remodeling crew is expensive and can take your kitchen offline for weeks or even months. I’ll show you how to give your kitchen a facelift for a fraction of the cost and disruption.Tools Required
- Cordless drill
- marking knife
- Router
- special cabinetry tools
- Table saw
- veneer roller
Materials Required
- PSA Veneer
- Wood finish of your choice

Meet the Expert

Associate editor Jay Cork loves giving new life to old things, and refacing cabinets is right up his alley.
Special Tools Used
These tools make refacing cabinets easy.

Veneer trimmer
- This tool from FastCap makes seaming veneer joints a snap. Find yours for $50 on Amazon.
Hinge-boring jig
- This hinge-boring jig from Veiko makes accurately installing European hinges as easy as 1-2-3. It’s $97 at Banggood.com.
Veneer cutter
- The Virutex laminate strip cutter costs $150, and it’s worth every penny.
Marking knife
- This flat-backed marking knife is perfect for trimming edge banding.
Flush-trim router bit
- This 1/4-in. flush-trim router bit is for trimming veneer.
Veneer roller
- This handy tool provides ample pressure to apply PSA-backed veneer.
Project step-by-step (20)
Step 1
Strip Down the Cabinets
Remove all the doors, hinges and drawer fronts. Label all the parts for reference later. I used numbers, but you can choose anything that helps you remember what goes where.

Step 2
Take Measurements
- Take accurate measurements of each rail and stile to determine the overall size of each cabinet.
- Pro tip: I drew all my cabinets in SketchUp, but old-fashioned graph paper works just fine.
- Next, measure all doors and drawer fronts and give each one a name or designation.

Step 3
Sand the Face Frames
- Normally I want to roughen a surface that’s being glued, but not with PSA-backed veneer. For pressure-sensitive adhesive, you want the substrate smooth.
- I sanded the painted surface of the rails and stiles with 320-grit sandpaper — not to sand off all the paint, only to make it smooth.

Step 4
Cut Veneer Strips
- Using the Virutex veneer cutting tool, cut the strips for the face frames 1/8-in. oversize. Any more would waste material.

Step 5
Veneer the Stiles
- Start by veneering the inside edges of the door frames, which creates the look of solid wood when the door is open.
- Next, apply veneer to the front of the stiles.
- Trim it flush with a compact router and flush-trim bit.

Step 6
Veneer the Rails
- With the FastCap seaming tool and a marking knife, trim the stile veneer flush to the rail.
- Apply veneer to the rail. Using the seaming tool again, trim it to fit.

Step 7
Sand the Face Frames
- Sand the face frame veneer to 180-grit. I used a random orbital sander to avoid directional sanding scratches.

Step 8
Apply Finish
- For this kitchen, I wanted to showcase the quarter-sawn white oak in its natural beauty.
- I chose a water-based urethane because it dries quickly and won’t turn the oak amber over time.
- To ensure good protection, I applied three coats of finish.

Step 9
Cut the New Parts
- Many shops will cut doors and drawer fronts for you. If you don’t have a table saw (or the time), this is a good way to go.
- Because I was after a continuously oriented horizontal grain pattern, I chose to make the parts myself.
- Label each part accordingly as you cut it.

Step 10
Veneer the Faces
- Lay the veneer face down on a flat work surface. Set the doors and drawer faces into position one at a time. I used 1/4-in. spacers to help position them.
- Once they’re all set, press down firmly on the backs.
- Cut them apart with a utility knife, making sure to run the blade down the center of the gap.

Step 11
Roll the Veneer
- After the parts have been separated, flip them over and use a veneer roller to apply pressure to the faces.
- Pressure-sensitive adhesive needs to be activated — press hard!

Step 12
Apply the Edge Banding
- Before trimming the veneer on the face, iron on the edge banding, starting with the bottom. I trimmed the ends of the edge banding with a sharp chisel.
- Next, do both sides, then finish with the top. Doing it in this order helps hide the seams on the corners.

Step 13
Trim the Edge Banding
- With the part face down, trim the edge banding with a knife. I chose a flat-backed marking knife because it keeps the cutting edge flat to the surface.

Step 14
Trim the Face Veneer
- I trimmed the face veneer using a compact router with a downward spiral flush-cutting bit ($25 online).
- This step could be done with a knife, but I prefer the perfectly clean edge the spiral bit produces. It’s much faster too.

Step 15
Drill for Cup Hinges
- I chose to replace the existing hinges with European soft-close hidden hinges. Using the handheld hinge-boring jig from Veiko, I drilled the 35mm holes for the cup hinge 4mm from the edge. The jig automatically places the holes 68mm from the top and bottom of each door.

Step 16
Sand the Parts
- With a random orbital sander, sand the doors and drawer faces up to 180-grit.
- After sanding the faces and edges of all the parts, ease the corners by hand with a used sanding disc.

Step 17
Apply the Finish
- Apply three coats of water-based urethane, lightly sanding with 320-grit sandpaper between coats.
- For the larger flat surfaces, it’s OK to use a foam roller to spread the urethane.
- Smooth out the finish by dry-brushing in the grain direction.

Step 18
Install the Doors First
- With the hinges attached to the doors, hold them up to the cabinet faces. I used a support spacer clamped to the bottom of the cabinet to help me position every door the same.
- Attach the hinge plates to the face frames with 3/4-in. No. 6 screws.
- Adjust all the doors so they look square to the face frame.

Step 19
Attach the Drawer Fronts
- Once the doors are adjusted, line the drawer fronts up with the tops and bottoms of the doors.
- Use double-sided tape to hold the drawer fronts in position. Then attach them to the drawer boxes with 7/8-in. drawer mounting screws through 1/4-in. holes in the drawer box.

Step 20
Install the Pulls
- With a shop-made hardware drilling jig, drill the holes for the handles and drawer pulls with a 5/32-in. drill bit.

Originally Published: August 30, 2022