


How to Use a Charcoal Grill for the First Time

Updated: Mar. 08, 2024
Want to take advantage of the summer weather and do some outdoor cooking? Learn how to use a charcoal grill with this step-by-step guide.
Introduction
Grilling food over charcoal is fun, and if you know what you're doing the results are delicious. Many BBQ gurus claim charcoal grilling is the best form of outdoor cooking, because it gives a more natural cooking experience and arguably better tasting results.
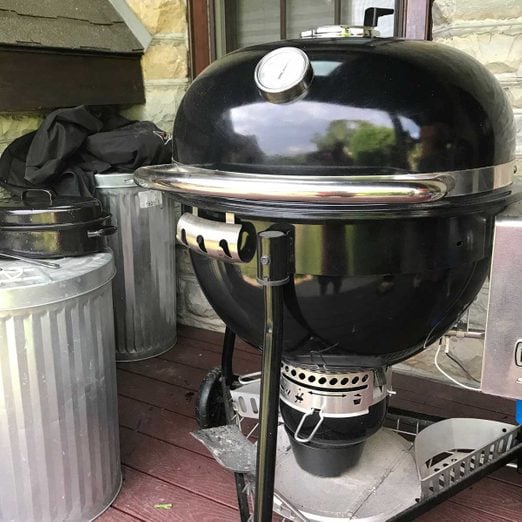
If you've never used a charcoal grill before, you might find it intimidating. But it doesn't have to be. Here you'll learn all about charcoal grilling and how to use a charcoal grill for the first time. In this guide you'll see photos of me using a kettle-style grill, but most of the principles apply to other types of charcoal grills as well.
Tools Required
- Charcoal chimney (optional)
- Fire poker
- Food thermometer (optional)
- Grill cover
- Grill gloves
- Metal garbage can with lid (for ash)
- Roasting pan with lid
- Stainless steel scissors
- Stainless steel wire brush
- Tongs or spatula
Materials Required
- Hardwood lump charcoal
- Lighter fluid or newspaper
- Meat
Project step-by-step (6)
Fill the Grill with Charcoal
- Lift the cooking grates and add hardwood lump charcoal to your grill’s reservoir.
- How much depends on what you’re cooking and the size of your grill.
- Spread the layer of charcoal several inches thick.
- Keep the bag of charcoal handy in case you need to add more later.

Light the Grill and Let it Heat Up
- Put on protective grill gloves.
- Use fire starter liquid (unless the charcoal contains some) and a match, or a charcoal chimney to light your charcoal.
- Open all grill vents fully, then close the lid (if your grill is a kettle style unit), and let the grill heat up to at least 300 degrees F. Many modern lidded grills have built-in thermometers for monitoring internal temperature.
- Tip: If your grill has no thermometer, hold your bare palm a few inches over the cooking grates. If you can only comfortably keep it there for up to three seconds or so, you’ve probably reached the approximate right temperature. Don’t keep your hand their long enough to burn yourself. Just long enough to feel the heat.

Stir the Charcoal and Clean the Cooking Grates
- With your grill gloves on, use a fire poker to stir the charcoal, mixing the burning lumps among those not yet ignited. Add more charcoal if what’s there is too thin to build up good heat as you stir the lumps.
- Wait until the grill is up to temperature, then open the lid and inspect the cooking grates for soot and debris.
- With your grill gloves on, use your stainless steel wire grill brush to scrape away the charred remains of previous grilling sessions until your cooking grates are clean. Scrape along the length of the grates rather than across them for best results. Here’s how you can clean a charcoal grill.

Adjust the Vents
- Close down the top vents on your grill if you’re working with a lidded charcoal grill model, while keeping the bottom vents open. This will slow combustion and allow flavor-filled smoke to collect in the grill.
- Monitor the grill temperature, aiming to keep it around 300 F or so for most meats. Searing steaks works best at higher temperatures, around 400 F.
- Slide the top vents open slightly if the grill temperature starts dropping too low.

Cook the Meat
- Lay your meat on the grill, then close the lid, making sure the bottom vents are still open and top vents are closed. Keep the heat even while cooking by slightly opening or closing the top vents as needed.
- Let the meat cook for a few minutes, then lift the lid and flip one piece with your tongs or spatula. If that underside is nicely browned, the other pieces are probably ready for flipping.
- Flip all the meat, continuing to monitor it often.
- If you’re nervous about overcooking, open the lid and check it more often. The meat will cook slower this way and won’t have as much rich, smoky flavor, but it’s easier to monitor.
- Use a food thermometer to test the internal temperature of your meat when you think it’s cooked.
- Pro tip: This isn’t strictly necessary, but as a new griller it’s a good idea until you get a better feel for the process. For beef, the minimum safe internal temperature is 150 F. Pork and poultry should be 165 F.
- Cut open one piece of meat with your stainless steel scissors. If it’s properly cooked right through, and you figure all the other pieces are the same, it’s time to stop cooking.
- Use your tongs and spatula to move all the meat into your roasting pan, then put on the lid. Let the meat rest in the pan for five to 10 minutes before serving.
- Don’t limit your grilling to meat alone. You can use your charcoal grill for veggies, pineapple, pizza, eggs and even bread.

Shut Down the Grill
- Shut the lid of your grill when you’re finished using it and close all the vents. This will stop the combustion process.
- Leave the grill to cool and go enjoy dinner.
- Return in an hour or two to remove the ash, leaving any unburned charcoal chunks for next time.
- I like to keep a lidded metal garbage can next to my grill for dumping ash. If you empty the ash, make sure there’s nothing flammable around, in case there are still some live coals or embers in the ash.
- Cover the grill to protect it from the elements until your next BBQ session. Here’s how to safely put out a charcoal grill. Looking for more options? Learn how to DIY a fire pit grill.

Originally Published: July 24, 2020