


If you've purchased snow chains and don't know how to put them on your car (or you're just curious) don't worry! Here's how you do it.
An hour or less
Beginner
Free
Introduction
If you live in an area where driving through lots of snow is the norm, you should definitely own a set of tire chains. Although some details will vary depending on the type of chains you're installing, these basic steps apply to nearly all passenger vehicle snow chains.
Tools Required
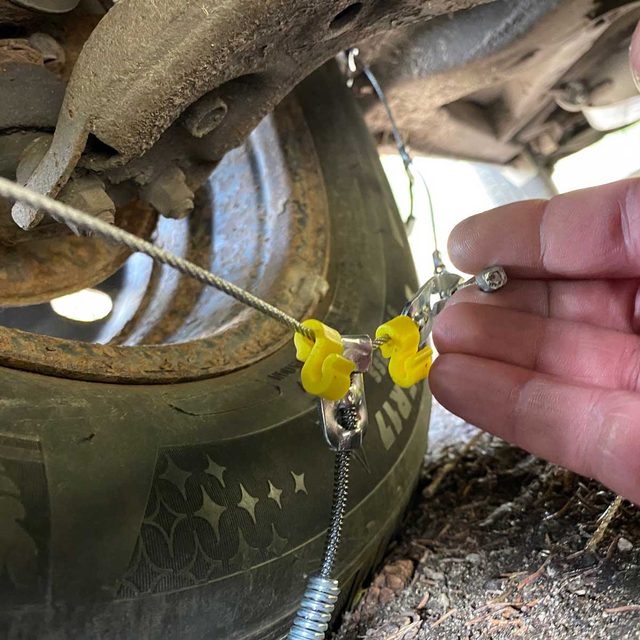
- Chain tensioner (depending on chain style)
- Set of snow chains
What Are Snow Chains?
In many areas across the country, winter weather turns roads icy and treacherous for long stretches of the year. You can get special snow tires that will help your vehicle handle better in the snow, but even those are sometimes not enough to get through the heaviest of winter storms. One of the best and most proven ways to give your car more traction in the snow is by throwing snow chains on your tires. Wrapping a snow chain around a tire allows it to bite deeper into the snow and ice, preventing your wheels from spinning out as easily. They’ll make your car a bit clunkier to drive and limit your speed, but that’s an easy trade-off when you’re dealing with slick roads. Here’s how to put snow chains on your tires.
Project step-by-step (6)
Step 1
Park in a Firm, Flat Area
- Find a flat, firm spot to pull over once you determine snow chains are needed.
- Be sure to choose a spot as far from traffic as possible.
- Note: If you can’t find a spot where the snow’s been cleared, do your best to clear it from around the tires you’ll be working on.

Step 2
Unpack and Roll Out Your Chains
- Remove chains from their storage bag or box, then carefully roll them out on the ground beside each tire you’ll be working on.
- Pro Tip: If your vehicle is rear-wheel drive, your chains must go on the rear wheels. For front-wheel drive, your chains should go on the front wheels, and all four tires should be chained for all-wheel drive.
- Fine-tune the position of your chains, so they lay straight, have no twists and extend equally in front of and behind your tires.

Step 3
Drape Chains Over the Tires
- Drape your tire chains one at a time over the tops of your tires, making sure any pointy hooks are pointing up and away from the rubber.
- Note: Make sure the chains are hanging evenly over the tires, with the same amount of excess chain draped over the treads and sidewalls.

Step 4
Make the First Chain Connection
- Reach under the vehicle to the inside face of your tires, and connect one end of each chain with the other using whatever fastening mechanism your chains use.
- Pull most of the slack from the chains to tighten this connection, making sure to leave a little slack so you’ll be able to make the second connection.
Step 5
Make the Second Connection
- Come around to the outside of each tire, and connect the other side of the chain with itself, just as you did under the vehicle.
- Re-inspect each chain when all 4 connections are made, ensuring they’re wrapped evenly over the tires, with the same amount of chain hanging over both the inner and outer tire sidewalls.
- Pull all the slack you can out of both sides of each chain, tightening the connections as much as possible. If your chains come with a tensioner, hook it on now.

Step 6
Drive Forward, Then Do a Final Tightening
- Drive your vehicle one car length forward once both chains (or all 4, if you’re working on a 4-wheel drive vehicle) are installed.
- Park your vehicle, then get out and inspect the chains. Chances are they’ll have slackened up with the movement of your vehicle. Pull them tight, removing any slack that has occurred.
- With your chains installed, keep your speed low. Park somewhere safe and remove your chains as soon as you’re back on dry pavement.

Originally Published: June 30, 2021