


Here’s the scoop — this is fun and easy!
Our editors and experts handpick every product we feature. We may earn a commission from your purchases.Learn more.


Updated Dec. 13, 2022
Here’s the scoop — this is fun and easy!
Our editors and experts handpick every product we feature. We may earn a commission from your purchases.Learn more.
2 hours
Beginner
$100 - $200


Charlie Eiler has been carving wood since he was six years old, teaching his first carving class at the ripe old age of 14. He’s now a lot older than that.
For most of my carving projects, I use a straight knife like this Flexcut roughing knife ($30 at Woodcraft). How a knife feels in your hand is more important than the brand. If you’re able, try before you buy.
For carving spoons, you need curved hook knives (about $45 each online). The right-handed knife is pulled toward your body with your right hand or pushed with your left. The left-handed knife works the opposite way. You may want both to work with changes in grain direction. Browse a complete list of the best whittling knives for all your woodworking projects.

Woodworking knives aren’t the same as sharpening regular knives. Carvers use a secret weapon to keep their knives sharper longer — a strop.
Make a habit of routinely drawing your blade on the strop as you carve and you won’t have to go to the stone nearly as often. Are you looking for more wood carving projects? Learn how to carve a wooden duck.
Pro tip: I use a little oil on my leather strop.

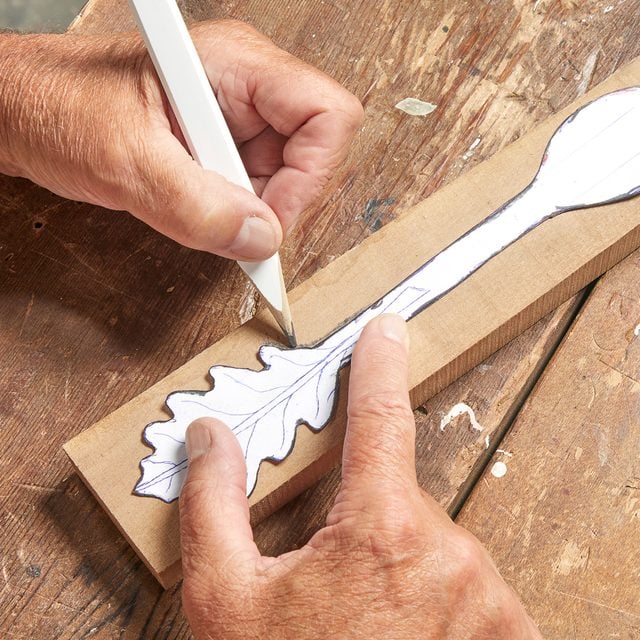
With a pencil, trace the pattern on a 3/4-in. thick wood blank.
A band saw makes this step a breeze, but you can do the rough cut with a scroll saw or even by hand with a coping saw. Cut as close to the line as you can.

Carve the concave bowl of the spoon first. With a curved hook knife, start in the middle and work your way to 1/4-in. from the edge.

Once you’ve carved the inside bowl to the desired depth, start shaping the outside with the straight knife. Leave the bottom about 1/4-in. thick.

Taking small cuts, trim the inside edge of the spoon bowl to create a thin lip.

Ease the edges on the back of the leaf with your straight knife. Use your opposing thumb to push the knife in short, repetetive cuts, creating a slightly rounded profile.

Cut a groove down the center of the back with the knife tip. Draw it down one side, then come in from the opposite side to trim the “V” to the desired depth.

Pressing at an angle, chip the scooped detail of the leaf petals. Cut one side, then the other, until you’ve achieved the desired shape.

After the top is complete, carve the back with the same technique as the top.

With the pencil, shade in the areas to be cut off. Trim the bottom of the stem with a straight cut.
Cut the edges of the stem down to the handle of the spoon. Bevel the edges of the stem to your liking.

Before finishing, I sand the inside bowl of my spoon with 220-grit sandpaper. Typically, I won’t sand any other part of the spoon. Remember, carvings don’t have to be perfect. Little flaws add character!

The fun thing about patterns is, you can use one for the spoon bowl and another for the stem. Mix and match to create unique designs.
Feel free to use this one or come up with your own. Then share your results with us at [email protected].

I use only one finish on spoons. Tung Oil Finish from MinWax is easy to use, dries fast and can be reapplied as often as needed.

Wash your spoons by hand, with only warm water and dish soap. Never put them in the dishwasher!
Originally Published: October 25, 2022