
How To Build a Planter Box for Your Deck Railing

Updated: Apr. 05, 2024
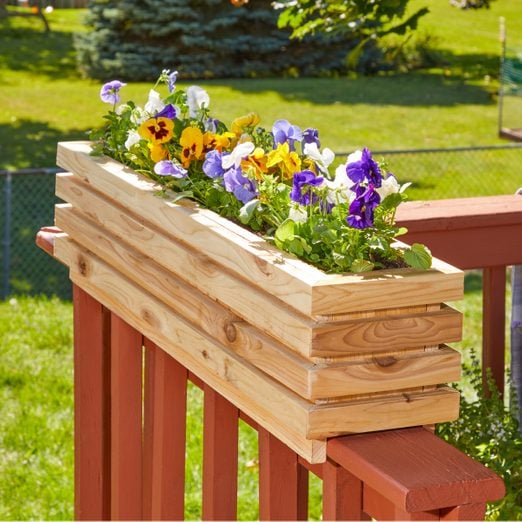
Add a little greenery to your outdoor refuge with this easy-to-build planter box that sits on the railing.
3 to 5 hours
Intermediate
Less than $100
Introduction
Got leftover wood? Try this compact project. It takes about a day to build and you don’t need a lot of woodworking skills to give it a try.Tools Required
- 18-gauge nail gun
- ⅜-in. drill bit
- Clamps
- Drill/driver
- Foam brush
- mitre saw
- Speed square
- Tape measure
Materials Required
- 1 qt. Exterior Semi-Gloss Polyurethane
- 1.25-inch Bran Nails
- 1x10x8 Cedar Wood Board (1)
- 1x2x8 Cedar Wood Board (5)
- 1x6x8 Cedar Wood Board (1)
- 2-inch Bran Nails
I wanted to spruce up our deck while adding a touch of greenery so I decided to create a deck railing planter. I had some leftover cedar wood from a deck project, which was perfect for this project.
This is a pretty simple project, so it’s great if you’re a new DIYer. Plus, it takes less than a day to build it. Railing planters make a great addition to a deck, giving it some bright colors that really add to the overall setting. There are huge variety of plants you can grow in planters, and a wide selection of them that don’t require a green thumb.
Planters also provide a practical way to grow your favorite plants, herbs, or flowers. If you don’t have a lot of space for a big garden, or if you just want to squeeze in a few more plants around your house, this project takes advantage of the space along your deck railing. This means you can enjoy a flourishing garden without sacrificing valuable floor space.

Pro tip: Line the bottom few inches of the planter with rocks to help keep it securely in place.
| Part | Qty. | Length | Width | Thickness |
| A – Long Sides | 2 | 36″ | 9 1/4″ | 3/4″ |
| B – Short Sides | 2 | 7 7/8″ | 5 1/2″ | 3/4″ |
| C – Bottom | 1 | 34 1/2″ | 5 1/2″ | 3/4″ |
| D – Long Slats | 8 | 36 1/8″ | 1 1/2″ | 3/4″ |
| E – Short Slats | 8 | 7 1/8″ | 1 1/2″ | 3/4″ |
Project step-by-step (7)
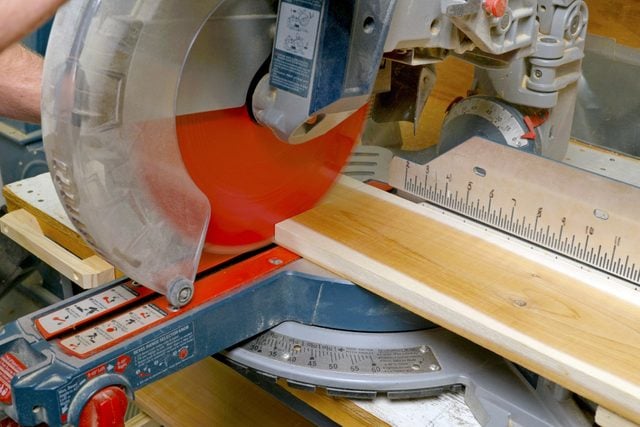
Cut planter box pieces
Following the measurements specified in the Cutting List, use a miter saw to cut the two long sides (A) from 1×10 material. Then cut the two short sides (B) and the planter bottom (C) from 1×6 material.
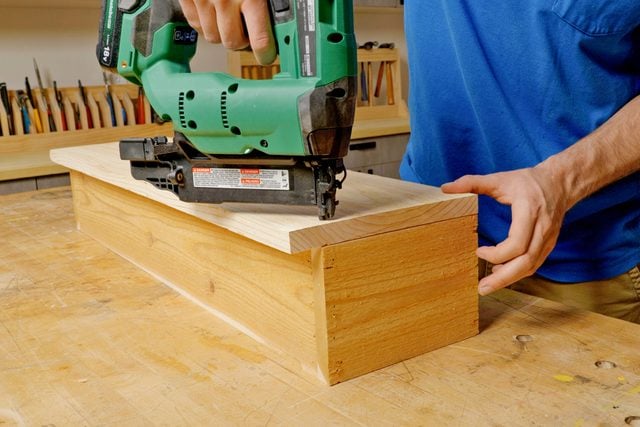
Assemble the planter box
Use an 18-gauge nail gun with 2-in. nails to secure the bottom edge of the short sides (B) flush to the bottom face of the box bottom (C). Next, nail the long sides (A) onto the U-shaped short side/bottom configuration so that the top edge is flush with the top of the short sides (B) and there is 13 /8 in. of the long sides (A) extending past the bottom (C).
Cut the slats
Cut the long (D) and short slats (E) from 1×2 material with a 45-degree miter on each end. Be sure to measure and cut these pieces carefully so that the distance between the miters precisely equals the box dimensions.

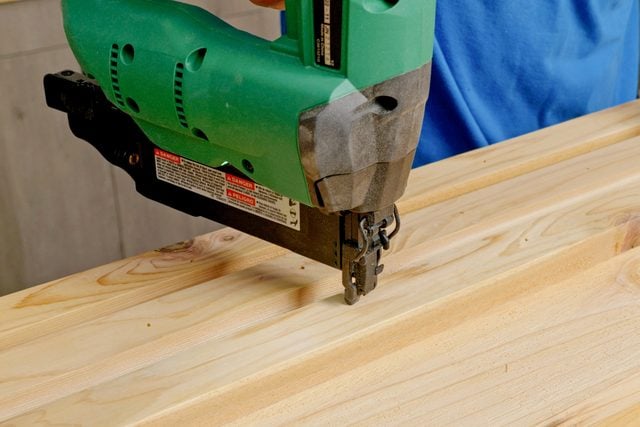
Attach the slats
Attach the long (D) and short slats (E) to the planter with an 18-gauge nail gun and 1¼-in. nails. You may find it easier to put all the slats on a single side of the box at a time, but you can also attach them ring by ring. However you attach them, ensure they are evenly spaced, leaving a 5 /8-in. gap between the slats. Use clamps to hold the slats in place while laying them out and nailing.
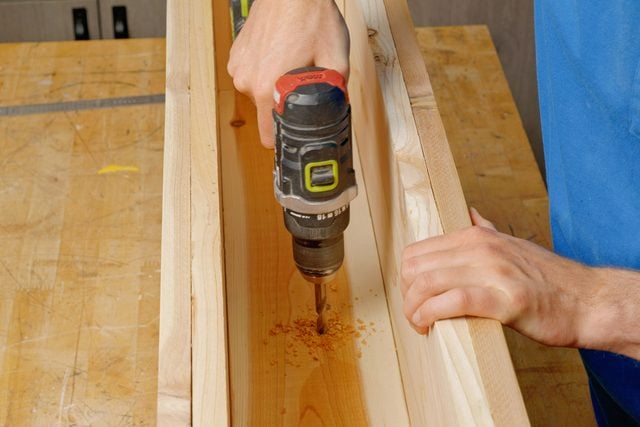
Drill drainage holes
Use a drill with a 3 /8-in. drill bit to drill three drainage holes in the bottom of the planter.
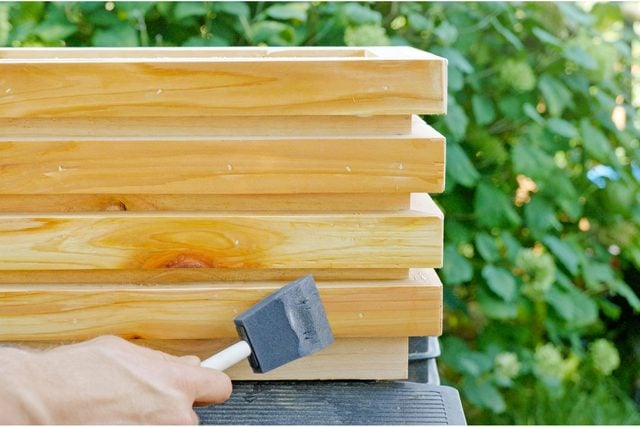
Apply polyurethane
With a foam brush, apply two coats of exterior polyurethane to the planter. Allow appropriate drying time (read the manufacturer’s directions) before using the planter.
Keep it elevated off the deck railing
Elevating the planter box slightly off the railing is essential. This ensures that the deck railing and planter bottom do not rot out. You can use pebbles or composite shims for this task, but we opted for plastic feet. They are often advertised as cutting board or furniture feet and are usually ¼-in. or 3 /8-in. tall. Move your planter after each watering or rainfall to further protect your railing.

Frequently Asked Questions
What kind of wood do you use for a planter box?
Cedar is a great choice because it’s lightweight, holds up to the elements and naturally resists termites. White oak and redwood are also good options since they have the same qualities.
Do deck planters need drainage holes?
Deck planters need drainage holes in the bottom of the box so that the plants don’t get too much water. If you’re overwatering your plants, the leaves can turn yellow or brown, its growth will be stunted or stop, and they can die because they’re not getting enough oxygen.
Originally Published: February 23, 2024